In todays market a photographer without an online portfolio is like a teenager without a mobile phone. It’s so important that you have somewhere online to direct potential clients, alongside somewhere which showcases your best work and gives an insight into who you are.
Do you have a website?
If not, you need to catch up. It’s extremely easy to set up a website today, with purposely built platforms which require no coding or technical knowledge.
But if you do have a website, is it up to scratch?
Is it mobile optimised? Search engine friendly? Do you have social integration alongside a good call to action to convert visitors into bookings?
In this video, I show you step by step how to set up a photography website and blog which looks professional, and ticks all of the boxes.
Difficulty Rating: 6/10
The only challenging factor might be the customisation of the theme I suggest. Domain registration, hosting and wordpress installation should be pretty straight forward if you follow the steps.
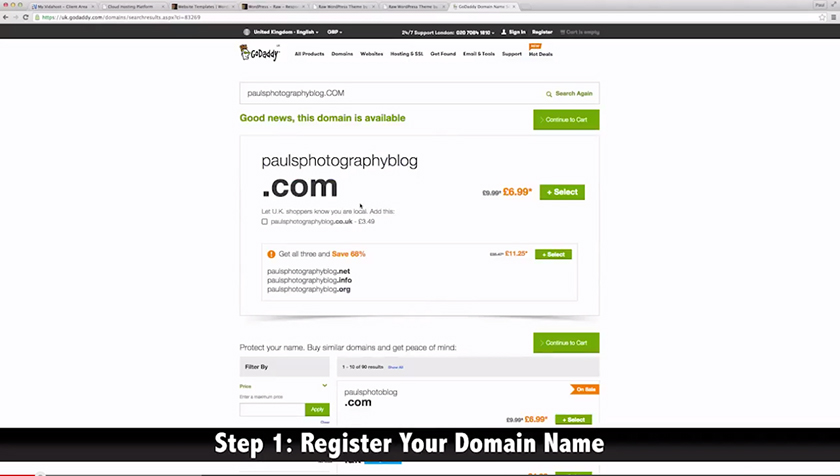
Step 1: Register Your Domain Name
The first step is a simple one, but it’s extremely important. Your domain name is your brand, it’s the place you’re going to direct people and it’s what you’re going to market. My advice is to only go after the .com, or the domain for your country (for example .co.uk) as settling for .org, .net, .co or .info will effect your branding and also your search engine optimisation. Of course, if both the .com and the domain for your country are available register them both.
In the past it’s taken me hundreds of ideas until I find an available domain name, so it might take some thought.
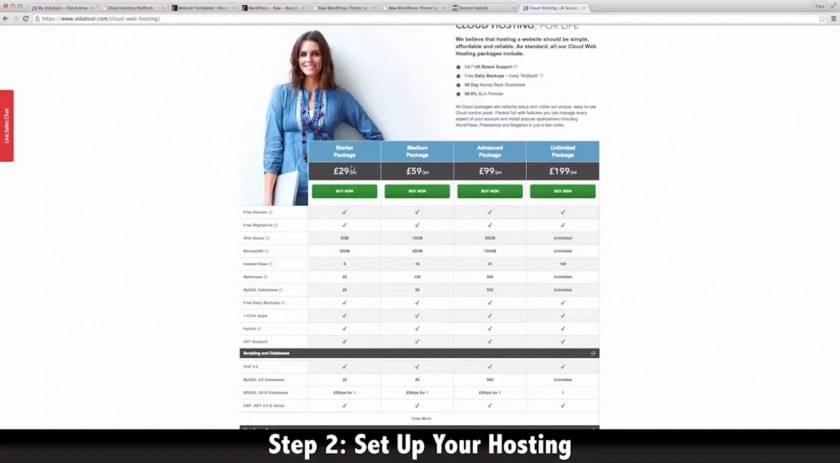
Step 2: Sign Up To Hosting
When you’ve registered your domain name, the second step is to register hosting. In a nutshell, without hosting you’ll have no where to store your website and it’s contents. It’s as simple as without hosting, you won’t have a website.
I use Vidahost for this video, but there’s other viable solutions such as LiquidWeb, BlueHost and HostGator.
Again, I often advise clients to start with the most basic, cheapest package. Unless we’re doing a ‘launch’ we won’t be expecting much traffic at the beginning, so the basic package will be able to handle a few hundred visits a day. When traffic starts to increase alongside the amount of content on your site, you’ll be notified by your host to upgrade.
Sign up to Vidahost here (10% off if you use the code PAULM)
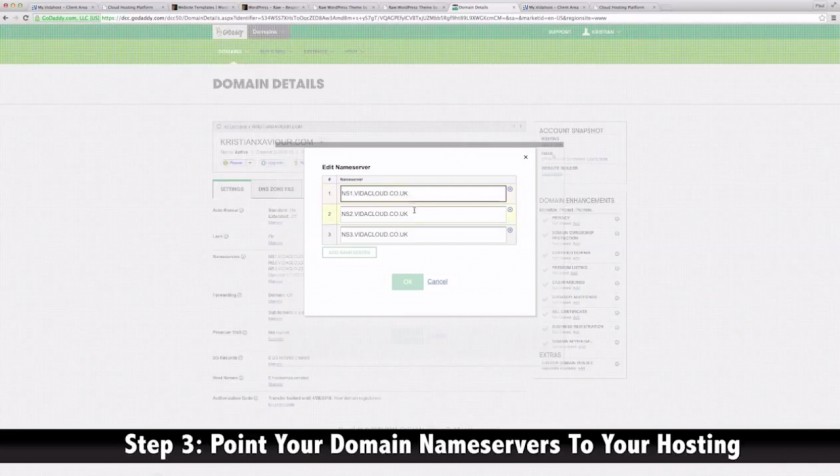
Step 3: Point Your Domain Nameservers To Your Hosting
This is only applicable if you register your domain and hosting on different platforms. I tend to do this quite a lot, just in case something goes wrong with one of them. Step 1 was to register your domain name with GoDaddy, you then signed up to Hosting over at Vidahost… now you need to point the domain to your hosting.
Don’t let that confuse you, and don’t worry too much about how it works… doing it as a simple process.
Simply log in to GoDaddy and manage the domain you’ve just registered. You’ll see the below screen, where you can click to manage the domain nameservers. Select custom, and then enter in the nameservers provided by your host. This will typically be found in the email they send to you when you sign up, or it will be within your hosting control panel. Still can’t find them? Contact your host and they’ll let you know which nameservers to use.
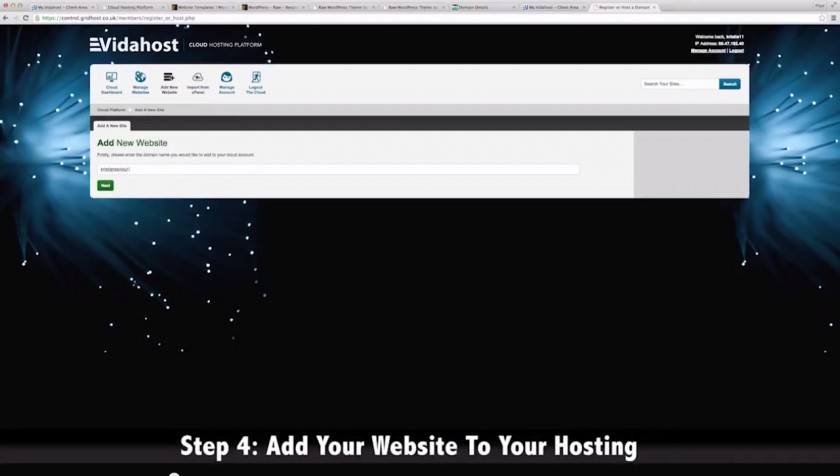
Step 4: Add Your Domain To Your Hosting
Now back in your hosting, you need to add your domain for the nameservers to propagate. In most cases, when you sign up to a hosting package you add your domain when registering. If this isn’t the case, within your hosting control panel you’ll see the option to ‘Add A Website’. Enter in your domain, and hit save.
When you’ve completed step 3 and step 4, you’ll be ready to start developing your website.
IMPORTANT: It can take 24 – 48 hours for the nameservers to fully propagate. Be patient if it doesn’t happen instantly.
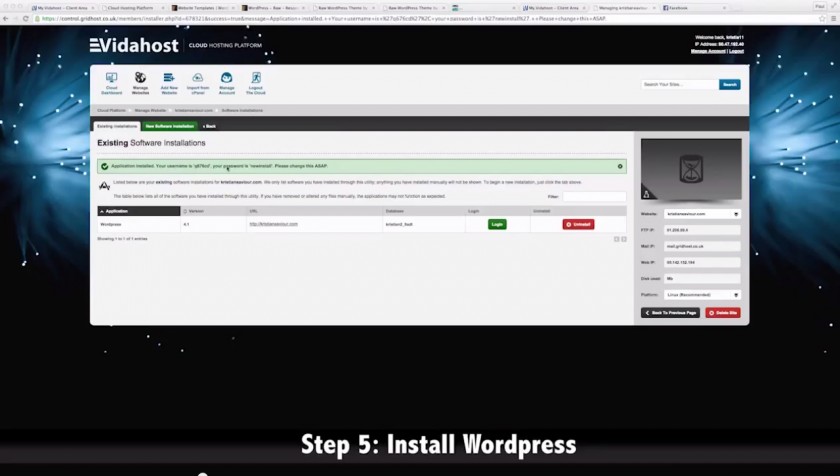
Step 5: Install WordPress On Your Domain
To build the website and blog we’re going to be using the easy to use, highly popular platform WordPress. Within your hosting control panel, you’ll see the option to install WordPress.
You’ll want to install WordPress on your root domain.
Again, the video walks through the exact steps to take here, and it really is a one click installation. Once installed, all of the WordPress files will be installed and you’ll have a functioning website you can edit. To login and make changes, use www.yourdomain.com/wp-admin and use the Username and Password provided when installing.
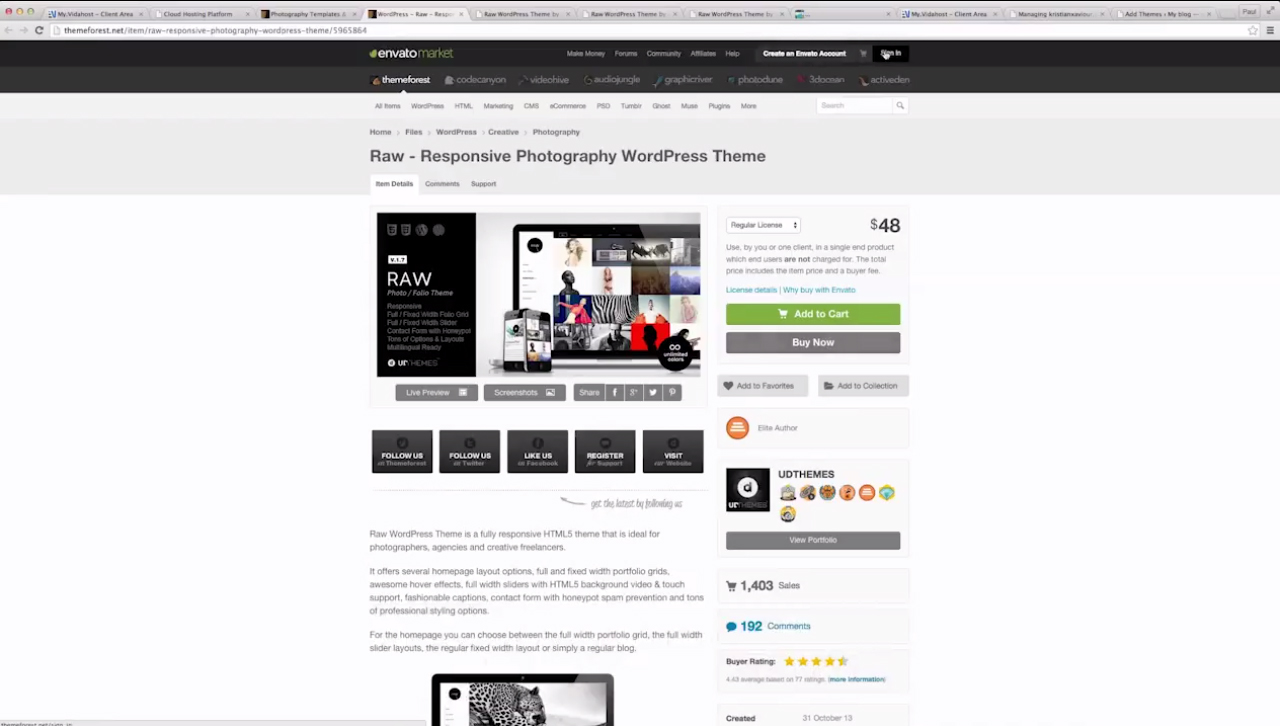
Step 6: Purchase The Theme
For this video, I use the theme RAW. It’s easily customisable, looks extremely professional and it’s also mobile optimised. For just $48 for a fully functioning theme, you really can’t go wrong.
Yes, if you don’t want to pay for a theme you can just use a free one. There’s a lot of free themes you can download online, or you can install and active them direct from the Appearance tab in WordPress. ThemeForest is what I use to find themes for any website I now create, and there’s endless options for photography websites on there too.
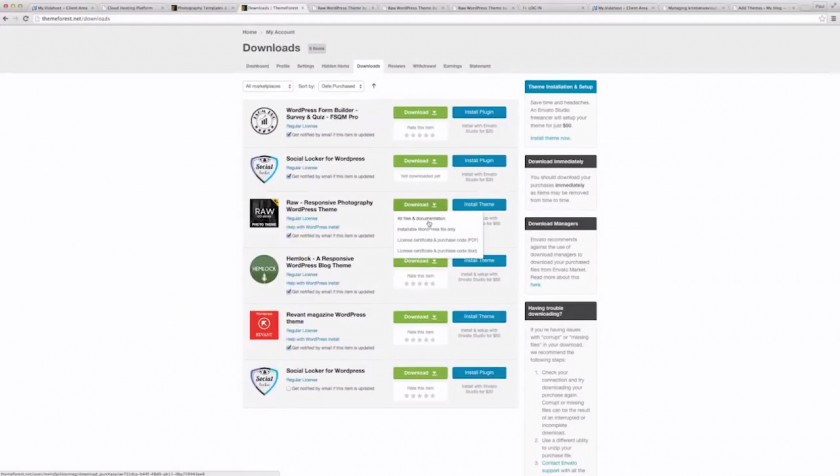
Once purchased, simply go to the Downloads tab in your account and you’ll be ready to download the files to install.
Step 7: Download The Theme Files
When logged in (and after purchasing the theme) go to the Downloads tab. You’ll see the theme you’ve just purchased, and you’ll want to click Download. I tend to opt for ‘Download All Files & Documentation’ as it comes with tutorials.
If you do it this way and choose ‘Download All Files & Documentation’ you’ll want to extract the .zip file when it’s downloaded. Within the .zip download you’ll find another .zip file (in this case called raw.zip). This is your theme, and this is the .zip file you install onto your site.
To make it easier, if you choose ‘Install WordPress Files Only’ it will download the theme .zip file directly.
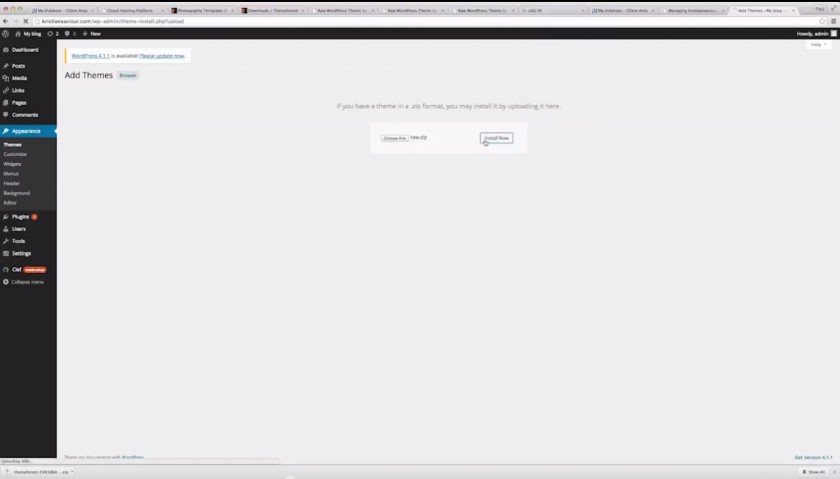
Step 8: Install The Theme .zip File Into WordPress
In WordPress, go to Themes > Add New and Upload Theme. Click the Choose File button and find the .zip you’ve just downloaded. Hit Install Now.
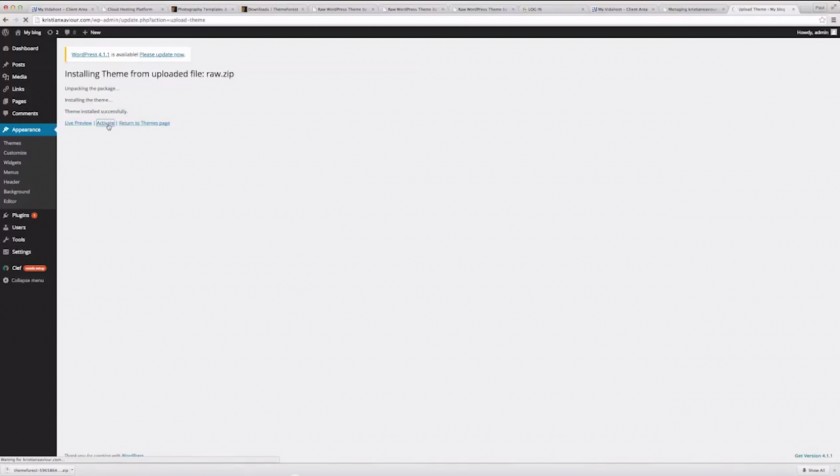
Step 9: Activate The Theme
Once the theme has installed, you’ll be able to Live Preview how it looks, alongside Activating it. You want to click Activate, which will then change the appearance of your current site.
Step 10: Adjust The General Settings
With the theme installed, you’ll want to adjust some general settings. Go to Settings > General and adjust the Site Title and Tagline. I also recommend adding the ‘www’ in to the domain if it isn’t already there.

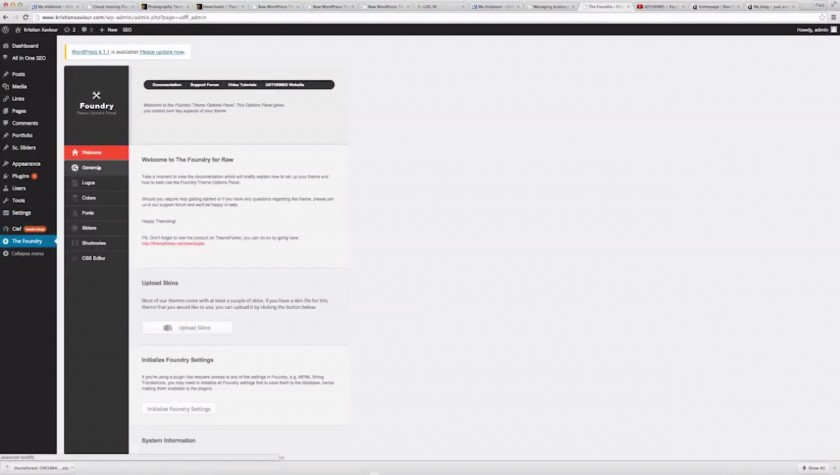
Step 11: Customise The Theme
With the theme installed and the general settings adjusted, you’re now ready to customise the theme. Each theme is different, and each theme comes with different customisation options. For the RAW theme, click the option ‘The Foundry’. This here is where you’ll be able to customise how the theme will look.
Setting up the homepage, the slider, the blog, your portfolio and keeping it updated is all covered in detail within the video.
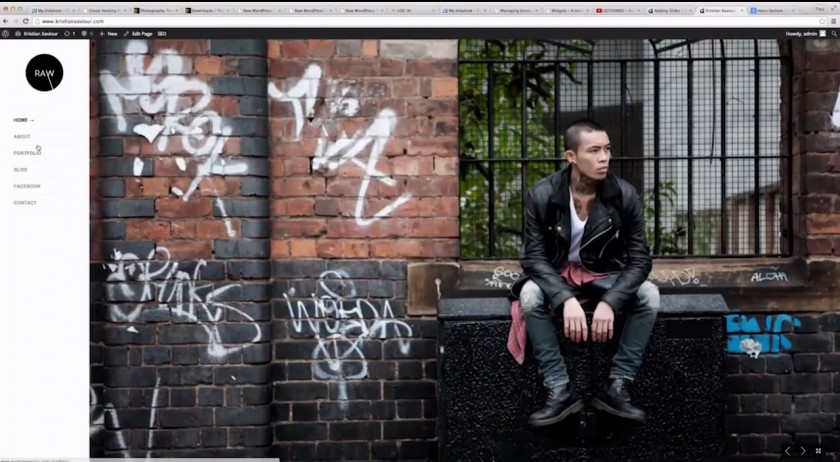
The End Product
So there we have it.
The video is 40 minutes long, and that’s me going through this step by step to produce the end product below. In just 40 minutes I created a highly professional looking photography website and blog which is ready to start marketing.
Being a photographer with an ugly looking website will place a negative effect on your work.
There’s no excuses, and this shows you exactly how to freshen up or create your first photography website and blog.
Don’t forget to update it with recent projects, alongside using the blog to give the visitor an insight into who you are. Blog about inspirations, showcase what goes on behind the scenes, post street style, offer tutorials and keep them updated with what you’ve got going on.
If you have any questions, or need any additional information leave a comment below.
Paul. M